
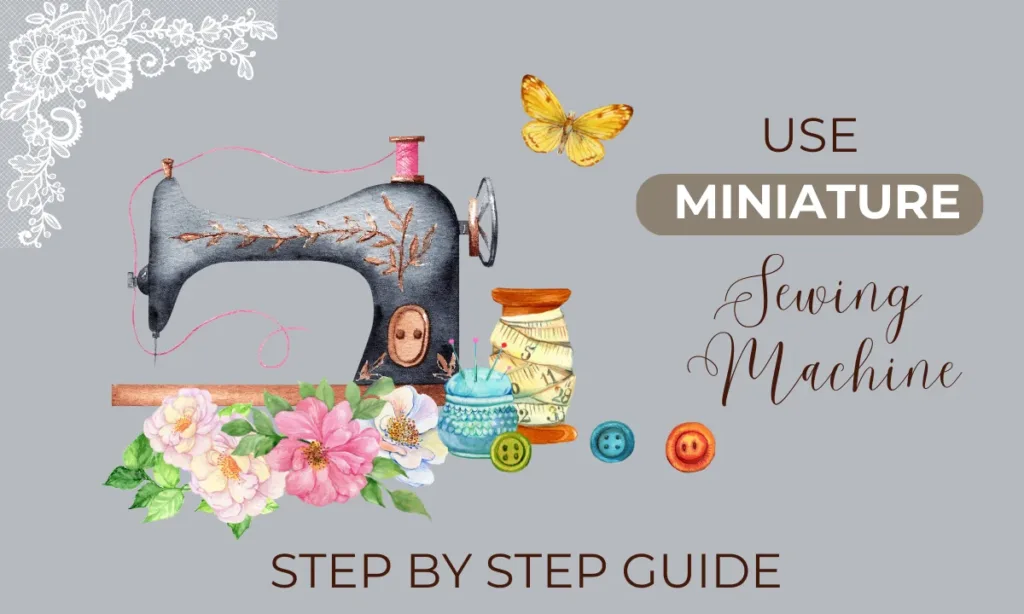
Are you intrigued by the convenience and portability of mini sewing machines but unsure about how to use them effectively? This step-by-step guide will walk you through the process of using your mini sewing machine like a pro.
How to Operate a Mini Sewing Machine?
We’ll cover everything from the basics of setup, use and troubleshooting common issues. So, let’s dive in and discover the world of mini-sewing! Whether you’re a novice eager to explore the world of sewing or an experienced sewist looking to embrace the practicality of a mini sewing machine, this guide is tailored to meet your needs.
How to Set Up Your Mini Sewing Machine?
Before we dive into the actual sewing process, let’s get your mini sewing machine ready for action. Follow these steps to set up your machine:
Unboxing and Inspection:
Carefully unbox your mini sewing machine and inspect it for any shipping damages.
Check if all the components, such as the foot pedal, power adapter, and accessories, are included as per the manufacturer’s instructions
Powering Up:
Connect the power adapter to your sewing machine and plug it into a power source.
Turn on the sewing machine using the power switch or button.
Threading the Machine:
Refer to the user manual to understand the threading process specific to your mini sewing machine model. Follow the threading diagram and make sure the thread is properly seated in the tension discs and the needle.
Inserting the Needle:
Carefully insert a compatible needle into the needle holder, ensuring it is secure and facing correctly.
What is a miniature sewing machine?
A miniature sewing machine is a compact and portable version of a traditional sewing machine. It is designed to be small and lightweight, making it ideal for small sewing projects, quick repairs, and crafting on the go. These mini sewing machines often come with essential features like a built-in stitch selector, a bobbin winder, and a foot pedal for controlling the sewing speed.
Miniature sewing machines are popular among beginners, hobbyists, and sewing enthusiasts who need a convenient and space-saving option for their sewing needs. They are also a great choice for those who have limited sewing space or need a portable sewing solution for travel.
Despite their smaller size, these machines can still perform various basic stitches, such as straight stitches and zigzag stitches, allowing users to accomplish a range of sewing tasks. While miniature sewing machines may not have the same level of complexity and capabilities as full-sized sewing machines, they are efficient for handling lightweight and medium-weight fabrics.
One of the main advantages of using a miniature sewing machine is its ease of use. Beginners find these machines user-friendly and less intimidating compared to larger, more complex sewing machines. Additionally, they are more affordable, making them accessible to a broader audience.
Overall, miniature sewing machines offer a practical and convenient way to pursue sewing projects without the need for a bulky, permanent setup. Whether you’re a beginner or an experienced sewist looking for a portable sewing option, a miniature sewing machine can be a valuable addition to your crafting arsenal.
What is the Use of Mini Sewing Machine? Step-by-Step Guide
Let’s Break the ice and get an understanding of the use of the miniature sewing machine.
1. Unboxing and Assembling Your Mini Sewing Machine
Carefully unbox your mini sewing machine and inspect it for any shipping damages.
Check if all the components, such as the foot pedal, power adapter, and accessories, are included as per the manufacturer’s instructions.
2. Familiarizing Yourself with the Different Parts and Functions
Take a moment to familiarize yourself with the different parts of your mini sewing machine.
Understand the purpose of the needle, thread tension dial, stitch selector, and other components. This knowledge will help you navigate the machine effortlessly and make adjustments as needed.
3. Preparing Your Mini Sewing Machine
1. Choosing the Right Thread and Needle
Selecting the appropriate thread and needle for your sewing project is crucial. Thinner fabrics require finer needles and lighter threads, while thicker materials demand stronger needles and heavier threads. Consult the machine’s manual or seek guidance from a local sewing store to choose the right supplies.
2. Threading the Bobbin
To ensure smooth stitching, it’s important to thread the bobbin correctly. Follow the specific instructions provided by your machine’s manufacturer to wind the bobbin and insert it into the bobbin case.
3. Threading the Upper Thread
Threading the upper thread is equally important. Pass the thread through the designated guides, tension discs, and the needle’s eye. Refer to your machine’s manual for detailed instructions on this process.
4. Properly Installing the Bobbin
After threading the upper thread, insert it into the needle and lower the needle, pulling the thread through the needle plate. Secure the thread by holding it gently while turning the handwheel.
Operating Your Mini Sewing Machine
1. Adjusting the Tension for Optimal Stitching
The tension dial controls the tightness of the stitches. Experiment with different tension settings on scrap fabric to achieve the desired stitch appearance. Gradually adjust the tension until the stitches are neither too loose nor too tight.
2. Selecting the Desired Stitch Length and Width
Most miniature machines allow you to adjust the stitch length and width. Determine the appropriate settings based on your project’s requirements. Longer stitches work well for basting and gathering, while shorter stitches provide stronger seams.
3. Understanding the Stitching Speed Control
Become familiar with the stitching speed control feature of your mini sewing machine. Some machines have a foot pedal for controlling speed, while others offer adjustable speed settings. Practice sewing at different speeds to develop control and accuracy.
Mastering Basic Stitching Techniques
1. Straight Stitching for Seam Finishing and Hemming
The straight stitch is the fundamental stitch used for joining fabric pieces and creating neat seams. Practice sewing straight lines on scrap fabric to achieve even stitches. This stitch is perfect for hemming garments and finishing raw edges.
2. Zigzag Stitching for Decorative and Stretchy Fabrics
The zigzag stitch adds strength and elasticity to seams and is ideal for stretchy fabrics. Experiment with different zigzag stitch widths and lengths to create decorative effects or finish the edges of your projects.
3. Buttonhole Stitching for Professional-Looking Buttons
Mastering the buttonhole stitch allows you to sew precise and professional-looking buttonholes. Mini sewing machines often have a built-in buttonhole function. Practice creating buttonholes on scrap fabric before attempting them on your actual project.
4. Reverse Stitching for Securing and Reinforcing Seams
Reinforce your stitches by utilizing the reverse stitching feature of your mini sewing machine. Sew a few stitches in reverse at the beginning and end of each seam to prevent unraveling and strengthen the seam.
Exploring Advanced Sewing Techniques
1. Using the Mini Sewing Machine for Quilting Projects
Although mini sewing machines are not typically designed for large quilting projects, they can still be used for small-scale quilting. Experiment with quilting techniques such as stippling or straight-line quilting on small quilted projects like placemats or pot holders.
2. Creating Beautiful Embroidery with the Mini Sewing Machine
With the right accessories and attachments, you can use your mini sewing machine for embroidery. Explore embroidery techniques like free-motion embroidery or use decorative stitches to add intricate designs to your fabric.
3. Working with Specialty Fabrics and Materials
Mini sewing machines are versatile enough to handle various fabrics and materials. Experiment with denim, leather, lace, or other specialty fabrics to expand your sewing capabilities. Adjust the needle, thread, and stitch settings accordingly to achieve optimal results.
Mini Sewing Machine Maintenance and Troubleshooting Tips
To ensure the longevity and smooth functioning of your mini sewing machine, proper maintenance is essential. Here are some maintenance and troubleshooting tips:
1. How to Change the Needle on a Mini Sewing Machine
Needles wear out over time, affecting the quality of your stitches. To change the needle on your mini sewing machine, follow these steps:
- Turn off the machine and unplug it for safety.
- Unscrew the needle holder and remove the old needle.
- Insert a new needle, ensuring it is pushed all the way up and tightened securely.
- Refer to your user manual for needle compatibility and replacement guidelines.
2. What Needles to Use in a Mini Machine?
Mini sewing machines require specific needle types to function optimally. Common needle types for mini machines include universal needles for general sewing, ballpoint needles for knit fabrics, and denim needles for heavy fabrics. Be sure to use the appropriate needle for your sewing project.
3. Troubleshooting Stitch Skipping, Thread Tangling..
Encountering sewing issues can be frustrating, but don’t worry! Here are some common problems and their solutions:
Stitch Skipping: Check the needle for bending or dullness and replace it if necessary. Ensure proper threading and tension adjustment.
Thread Tangling: Rethread the machine, ensuring the thread is passing through all the required guides correctly.
Uneven Stitches: Check the tension settings and adjust as needed. Also, ensure the fabric is feeding smoothly through the machine.
4. Cleaning a Mini Sewing Machine
Regular cleaning is crucial for the smooth functioning of your mini sewing machine. Follow these steps to keep it in top shape:
- Turn off the machine and unplug it.
- Remove the needle and presser foot to access the bobbin area.
- Gently clean the bobbin case and feed dogs with a brush or lint-free cloth.
- Oil the machine as per the manufacturer’s instructions, if applicable.
How to Thread a Mini Sewing Machine Step-By-Step
Threading a mini sewing machine may seem daunting at first, but with a bit of practice, it becomes a breeze. Here’s a step-by-step guide:
Thread Spool Setup:
Place the thread spool on the spool pin and secure it with the spool holder.
Thread Guides:
Follow the threading diagram on your machine to pass the thread through the designated thread guides.
Tension Discs:
Make sure the thread passes through the tension discs to ensure proper tension control.
Bobbin Winding:
Wind the bobbin following the machine’s instructions and load it into the bobbin case.
Needle Threading:
Thread the needle from front to back, leaving a tail of about 4-6 inches.
Drawing Up the Bobbin Thread:
Hold the needle thread with your left hand and turn the handwheel toward you with your right hand to bring up the bobbin thread.
Pulling Up the Bobbin Thread:
Gently pull both threads toward the back under the presser foot.
How to Do a Zigzag Stitch on a Mini Sewing Machine?
The zigzag stitch is a versatile stitch that prevents fabric fraying and adds decorative flair. To do a zigzag stitch on your mini sewing machine, follow these steps:
- Select the zigzag stitch option on the stitch selector dial or panel.
- Adjust the stitch width and length if your machine allows for customization.
- Hold the fabric with both hands, position it under the presser foot, and lower the presser foot lever.
- Begin sewing slowly, guiding the fabric to create the desired zigzag pattern.
Safety Precautions – Mini Sewing Machine For Home
While using a mini sewing machine, prioritize your safety by following these precautions:
- Read and understand the machine’s manual before operation.
- Keep your fingers away from the needle while sewing.
- Unplug the machine when not in use.
- Use a proper sewing surface and ensure it is stable.
- Keep loose hair, clothing, and accessories away from moving parts.
- Preventing Accidents and Injuries
Safety Hacks of Mini Sewing Machine:
- Use sharp scissors or snips for cutting fabric.
- Store needles and pins safely in a pincushion or a magnetic holder.
- Keep the machine and its accessories out of the reach of children.
- Avoid distractions and maintain focus while operating the machine.
FAQs:
Can I use a miniature sewing machine for heavy fabrics?
While miniature sewing machines can handle lightweight and medium-weight fabrics, they may struggle with heavy fabrics like denim or canvas. It’s best to stick to fabrics suitable for your machine’s capabilities
Are miniature sewing machines suitable for beginners?
Yes, miniature sewing machines are often recommended for beginners due to their simplicity and ease of use. They provide an excellent entry point into the world of sewing.
Can I use a miniature sewing machine without a foot pedal?
Some miniature sewing machines can be operated without a foot pedal, using a button or lever to control the sewing speed. However, the availability of this feature depends on the specific model.
How Many Stitches Does a Mini Sewing Machine Have?
Mini sewing machines typically offer a selection of basic stitches, such as straight stitch, zigzag stitch, and sometimes a few decorative stitches. The number of stitches may vary depending on the model and brand of the machine. While mini sewing machines may not have as many stitch options as larger ones, they still provide enough versatility for various sewing projects.
Conclusion:
In conclusion, using a mini sewing machine is an enjoyable and convenient way to unleash your creativity and tackle quick sewing tasks. By following the step-by-step instructions provided in this guide, you’ll be well on your way to becoming a skilled mini-sewist. Embrace the compactness and versatility of your mini sewing machine and let it become your reliable companion for all your sewing adventures.
Remember, practice makes perfect, so don’t be discouraged if you face some challenges in the beginning. As you get more comfortable with your mini sewing machine, you’ll discover its true potential and the joy of creating beautiful and functional projects.
So, dust off your mini sewing machine, gather your fabrics, and let your creativity run wild. Whether you’re a seasoned sewist or a beginner, the world of mini-sewing machines offers endless possibilities for creating wonderful projects. Happy sewing.