How To Setup A Sewing Machine?
Are you looking for “Setup A Sewing Machine”? Many people use sewing machines for different purposes. It can be used for both fun and sewing fabric or other materials together.
But the main problem that mostly comes the way is how to set up a sewing machine before you use it.
Also, It can be a little bit tricky at the beginning but when you become familiar with its parts, there is nothing in this world that you can’t do.
How To Setup A Sewing Machine?
Sewing machine setup depends on the brand, model, and series, where it comes from. And, it becomes difficult to understand the actual starting procedure.
But no worries, because we are here to provide you with the right information about setting up a sewing machine.
However, it doesn’t take much time to set up a sewing machine. It only needs a little time of yours to make sure your machine is perfectly ready to start clinking. And if you want to be an expert quilter or just want to work on a few basic sewing patterns.
The only thing you have to do is to read this article completely. Because we are not only going to provide details about “setting up sewing machine”, but gonna tell you about its basic parts, functions, and techniques also. So, let’s just not waste more time because…
-According to Jim Rohn-
“Time is more valuable than money. You can get more money but you can’t get more time”
Let’s proceed with the basic steps and guides…
What Is A Sewing Machine?
Before learning the sewing machine setup, it is essential to know what a sewing machine is. After knowing details about this, you’ll be able to understand the setup more easily.
Here’s what it is:
A sewing machine is a sewing equipment that is used mostly in textile industries for stitching fabrics and other bendable materials by using thread and needle. Moreover, It is not only used in business factories but is also in use at homes to decorate items like:
- Furniture Covers
- Bedding Items
- Table Cloths
- Pillows
- Shopping Bags
Different sewing machines have different duties to follow. But most of them are used to improve the delicacy and presence of fabrics.
Read Also: sewing machine parts and functions
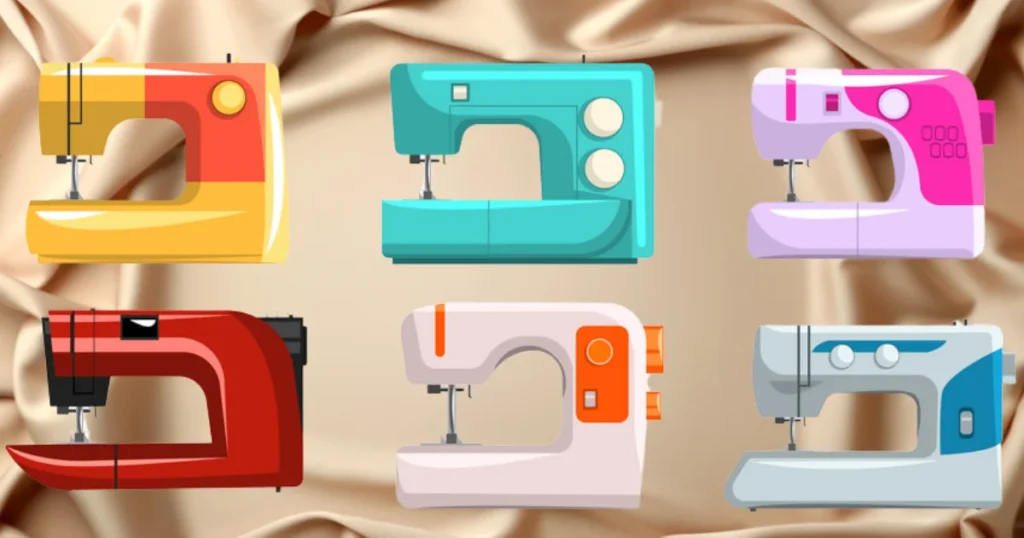
Types Of Sewing Machines
If we talk about modern sewing machines then there are three main types. These are usually powered by electricity and have different components from each other.
These are as follows:
1. Hand Sewing Machine
A hand-operating sewing machine is also known as a handheld or manual sewing machine. It is generally operated by hand. You can rotate the hand wheel of it by running it at a low or high speed depending on your choice.
Moreover, Hand sewing machines are compact and portable tools designed for basic sewing tasks without the need for electricity. They offer a convenient alternative to traditional sewing machines, allowing users to perform simple stitching, repairs, and alterations on the go.
Moreover, these sewing machines are particularly suitable for beginners and those looking for a cost-effective solution for minor sewing projects.
While they lack the advanced features and speed of electric sewing machines, hand sewing machines provide a handy option for quick fixes. And it also performs sewing tasks in situations where a larger machine might not be readily available.
Pros and Cons of Handheld Sewing Machine
[i2pc show_title=”false” title=”Pros & Cons” show_button=”false” pros_title=”Pros” cons_title=”Cons” button_icon=”icon icon-cart-4″ link_text=”Check Price” link=”#” ][i2pros]Portable, compact and lightweight sewing machine
User-friendly
Best suitable for beginners.
budget-friendly sewing machine
Handy for quick repairs and emergencies
[/i2pros][i2cons]Limited Features
Not for Heavy Fabrics[/i2cons][/i2pc]
Best Handheld Sewing Machines: Our RECOMMENDATION
The best handheld sewing machines and their key features are given below:
SINGER 01664 Stitch Sew Quick
- Strong and durable.
- Can sew at two different speeds.
- Strong and sturdy
SINGER 01163 Handheld Sewing Machine
- Easy to use.
- Requires no cord.
- Contains extra items.
MICHLEY LSS-202
- Comes with free extras.
- Uses two threads to make stitches.
- Has a special bobbin system.
Sunbeam Portable Cordless
- Small in size.
- Easy to carry.
- No need for cords.
KPCB Mini Handheld Sewing Machine
- Compact size.
- Easy to hold.
- Perfect for small scaling tasks.
2. Treadle Sewing Machine
Treadle sewing machines are controlled by a foot pedal. The user pushes the foot pedal by moving them in a backward and forward position. These antiques are mostly used in antique and trash shops and can also be found in garage sales.
Treadle sewing machines are quite old and are often considered as valuable antiques. You might see it in stores that sell old things and even in places where people sell things they don’t need anymore.
Even though these are not used as modern sewing machines but are still attractive to look at. These can remind us of how people used to sew before we had electricity to power our machines.
Pros and Cons of Treadle Sewing Machine
[i2pc show_title=”false” title=”Pros & Cons” show_button=”false” pros_title=”Pros” cons_title=”Cons” ][i2pros]Eco-friendly Features.
No electricity is needed.
Allows an easy leg workout while sewing.
Traditional antique.
Historical worth.
[/i2pros][i2cons]A little bit slower than modern machines.
Challenging for thick textiles.[/i2cons][/i2pc]
Best Treadle Sewing Machines: Our RECOMMENDATION
The best treadle sewing machines and their attributes are given below:
Singer Model 66 Treadle Sewing Machine
- Known for running smoothly.
- Comes with a wide work area.
- Can sew numerous stitches.
Singer Model 27 Treadle Sewing Machine:
- Stunning and elegant design.
- Provides interesting stitching patterns.
- Well-known quality brand.
White Family Rotary Treadle Sewing Machine:
- Small and lightweight.
- Simple to move around.
- Popular for basic sewing projects.
New Home Treadle Sewing Machine:
- Reliable for everyday sewing.
- User-friendly interface.
- Well-built and persistent.
Wheeler & Wilson No. 8 Treadle Sewing Machine:
- Creative rotatory hook design.
- Provides reliable stitching.
- Well known for quiet running.
3. Electric Sewing Machine
Electric sewing machines (as the name indicates) are powered by electricity. They run very fast and smoothly. And due to their outstanding output capacity, these are also known as industrial sewing machines.
Moreover, these sewing machines are great for making clothes, bags and all kinds of things. They’re super helpful when you need to sew a lot in a very short time.
Plus, they also have different stitches you can choose from. So you can make your sewing look extra nice. And just like how a car needs gas, these sewing machines need electricity to work. You can plug them into a power outlet, and you’re ready to sew!
Pros and Cons of Electric Sewing Machine
[i2pc show_title=”false” title=”Pros & Cons” show_button=”false” pros_title=”Pros” cons_title=”Cons” ][i2pros]Fast and smooth sewing machine.
Perfect for a variety of sewing tasks.
Provides wide range of stitches.
Can withstand heavy fabrics
Saves time and effort.[/i2pros][i2cons]Some features might be a little bit difficult for beginners.
Expensive than manual sewing machines.[/i2cons][/i2pc]
Best Electric Sewing Machines: Our RECOMMENDATION
The Best Electric Sewing Machines and their attributes are given below:
Brother CS6000i
- Includes 60 built-in stitches.
- An automatic needle threader.
- Adjustable speed controls.
Singer Heavy Duty 4423
- A powerful motor for heavier fabrics.
- Bedplate made of stainless steel.
- Fast stitching speed.
Janome Magnolia 7318
- Long-lasting and reliable performance.
- Adjustable stitch length and width.
- Lower feed for free-motion quilting.
Juki HZL-F600
- 225 different stitch patterns.
- Box feed technology for fabric feeding.
- Large sewing area for larger projects.
Bernina 530
- Superior stitch controls.
- 148 stitching patterns.
- Wide range of alternative accessories.
Sewing Machine Parts And Their Functions
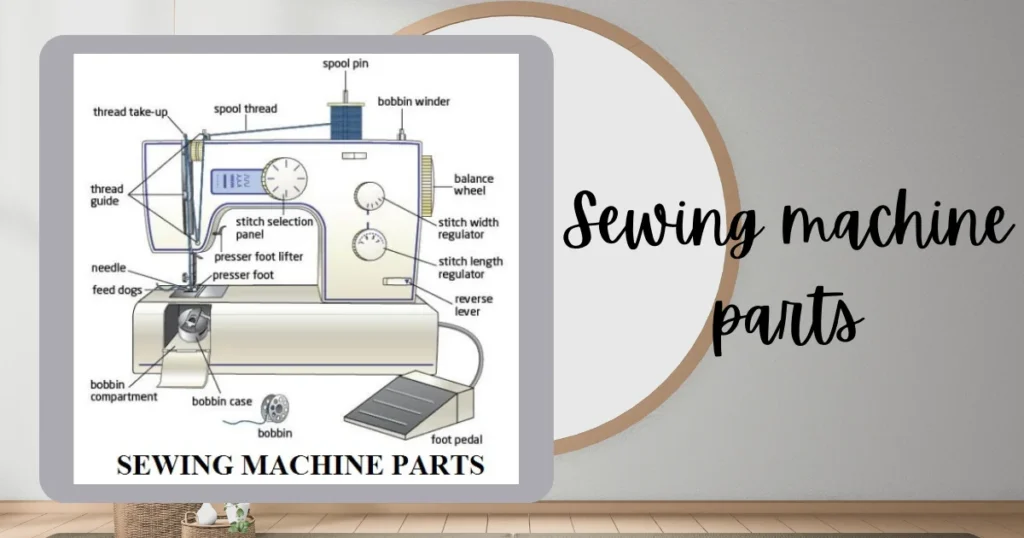
You must have to understand the components of a sewing machine first to learn sewing machine setup. Even though, each machine is slightly different from the other depending on the type you have. But most models contain similar basic parts and are used for the same purpose.
The parts of a sewing machine and its functions are as follows:
Cord and Power Switch:
Every sewing machine contains an on/off switch button and electrical cords which are usually located at the back of the sewing machine. And, Its function is to provide electricity to the machine to give the energy, to work properly.
A Foot Pedal:
The machine’s speed is controlled by a foot pedal. When it is pushed strongly, the needle moves fast and can sew a line very quickly.
At the same time, when it is pressed smoothly, the needle starts to move slowly which takes a little bit long time to sew a line on the provided material.
Needle:
The part that passes a sewing thread through a piece of fabric; is the needle. It’s the most important part of a sewing machine. It is mainly used for carrying thread and making stitches or knitting the object.
Spool Pin:
On the top of the machine, there’s a pin or spindle that works as a spool holder and helps the spool to spin with proper tension in a thread to feed the needle.
Foot Presser:
It is a two-pronged metal component. You can use it by lowering it down onto your piece of cloth. Moreover, It helps to hold the cloth flat so that it can’t rise and fall with the needle when it starts moving in an up-and-down motion.
Bobbin Case:
A bobbin case is also known as a container that stores a small spool of thread called a bobbin. It is found beneath the foot presser and needle.
When the sewing machine starts piercing the fabric, this bobbin feeds the lower thread into the stitch to make it secure.
Knob For Needle Position:
There is a hand wheel in the sewing operator that allows you to control the speed of a needle. Due to different variations in all the sewing machines, it can be a button also instead of a hand wheel.
Reverse Stitch Button:
When the foot pedal is pressed to start stitching in the forward position. It finishes the fabric line by using a button called the reverse stitch button(by changing its direction). Also, It helps you to move your stitching in a backward position to prevent it from unravelling.
Stitch-Type Knob:
Mostly, sewing machines allow you to select different stitching types of your own choice. So, it may be straight or zigzag.
Manual machines do this job by using a knob whereas, on computerized machines, it can be done by a touch-screen display.
Stitch-Length Knob:
It controls how far your needle should go while piercing the fabric. If it stitches longer, then it will have fewer holes. And if it stitches shorter, it will result in more holes closer together.
Stitch-width wheel:
The stitch-width wheel defines how much the width on either side of the needle should be while piercing the fabric. Mostly, it is zero for straight stitches and for a zig-zag stitch, it can be increased.
How To Setup A Sewing Machine?
Despite this fact, setting up a sewing machine may seem difficult at first. But once you have finished this process, it will become an automatic routine of yours.
However, you should check the manual given with the machine also(if you’ve got one).
Reading the instructions about the sewing machine setup given on it can help you with this. And to ensure what you are doing, you should start by putting the machine on an unbreakable table with plenty of light.
Here comes the actual purpose of writing this article about “How to set up a sewing machine”.
Step 1 – Connect it to the power source
It is quite simple to do within a matter of seconds. All you have to do is just to arrange the cords properly by finding the right plugs. And then the actual work begins!
Step 2 – Place the needle in
When it comes to the needle-setting process, there are several sizes available to pick from. This is where the manual handbook becomes helpful to you.
Because this handbook indicates the needle sizes and which kind of fabrics these are used for. The manual’s first page almost covers this information.
Step 3 – Fix the presser foot
Fixing the presser foot to a sewing machine is a straightforward process. You have to start by turning off the machine for safety.
After that, put the presser foot lever behind the needle area to raise its highest position. And then lower the presser foot lever gently and secure the foot in place.
Step 4 – Thread the machine
You must have to thread your sewing machine before you start stitching. Just pull the thread from the spool and take up the lever until you cross it through the needle eye.
Just read out the instructive handbook carefully, in case you got stuck, You will get through this easily!
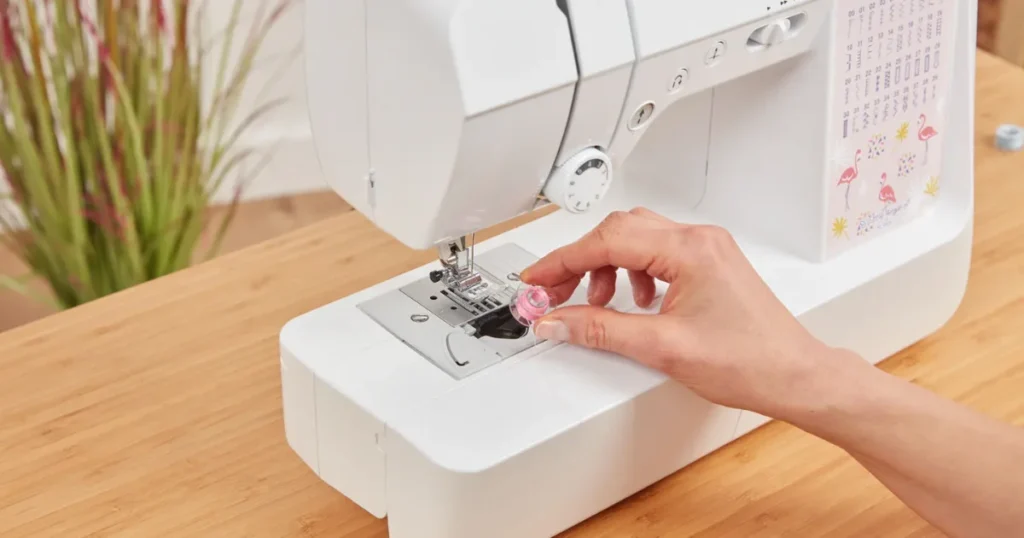
Step 5- Load a bobbin container:
A bobbin is a small cylinder holding thread in a sewing machine. It is found underneath the needle. There will be an arrow also that points out which position the bobbin should be adjusted for unspooling properly.
How To Use A Sewing Machine?
After setting the whole thing up, you are finally ready to use your sewing machine. Here are some steps and guides for using your sewing operator gently.
– Make sure your needle is raised
According to your sewing brand and model, you can adjust the needle’s position either with a knob or a button.
– Place the fabric
You have to place the fabric beneath the needle where you want to make your first stitch. After that, just lower the presser foot to maintain its exact position.
– Press the foot pedal
Now, press the foot pedal to allow the needle to start stitching the provided fabric. Press it more strongly to speed it up and slowly to make it work more gradually
– Lock the first stitch you make
A very best practice is to lock your stitch at the very first starting and ending point to avoid unraveling. To do this, just make some stitches by pressing the “lock stitch” button and double up them before releasing the button and moving forward again.
– Guiding the fabric
For making a straight line on the fabric, just put the edge of the fabric under the needle to sew it up. Your machine will automatically start pulling the fabric through it. You don’t even need to pull it by yourself.
– Adjust the needle and presser foot
After finishing the stitching procedure, set the needle and presser foot up so that when you pull your fabric away, it can’t ruin it.
– Slide the fabric
Take away the fabric from the machine after setting the presser foot and needle. It will pull a long thread with it also which you should cut with the scissors carefully.
How to set up a sewing machine for beginners
If you are a beginner and don’t know about how sewing machines work from scratch. You no longer need to worry about it anymore. Because we are here to provide you with some helpful tips and tricks. These will help you get a start without any kind of concern.
Tips and Tricks- Setup A Sewing Machine
Here are some straightforward and helpful tips and tricks for setting up a sewing machine for beginners. Let’s check those out!
- Find out the place with plenty of light where you can turn your machine on.
- Connect the foot pedal to the machine to have a great sewing experience.
- Place the needle in it, if there’s already a needle there it’s well and good.
- Use a hand wheel to check whether the needle is freely moving up and down or not.
- You can use the knob to help release the sewing machine’s needle.
- Wind the thread around the bobbin and then set it in a locked position.
- It will automatically start to wind the thread around the bobbin.
- When the bobbin will finish winding the thread, it will snap off from your hand.
- Take a spool and place it to feed the needle by crossing the thread by using a lever.
- Now, place a piece of fabric or material you want to stitch in that machine.
- Lock the first stitch you make so that the material can’t move anywhere.
- After you finish stitching, take away the fabric and cut the extra thread with scissors.
By following these steps you can make your needlework more fun!
FAQs: Setting Up A Sewing Machine
[sc_fs_multi_faq headline-0=”h4″ question-0=”How to use a Singer sewing machine?” answer-0=”Firstly, thread the upper and lower parts of a Singer sewing machine. After that, place the fabric by setting the foot presser down. Now push the foot pedal strongly and start stitching the fabric.” image-0=”” headline-1=”h4″ question-1=”How do you set a sewing machine stitch?” answer-1=”To set the stitch you want, just look at the knob of your machine. Then turn on the knob or just pick another one from the screen display to change the stitch setting. The first stitch is mostly a straight stitch which is good for many things.” image-1=”” headline-2=”h4″ question-2=”What are the 5 processes of basic sewing?” answer-2=”The 5 processes of basic sewing: Get ready for your desired pattern. Prepare the fabric and then cut it. Mark the folds and stitch them. Sew the back zip. Stitch the shoulder seams together.” image-2=”” headline-3=”h4″ question-3=”What are 3 important rules when using a sewing machine?” answer-3=”The three important rules when using a sewing machine are: Take care of your hands and concentrate on your task with a proper focus. Have a good distance from the needle by taking away the sharp things from the machine’s belt. Use the tools from the side drawer to make sure your workspace is well-maintained.” image-3=”” headline-4=”h4″ question-4=”How to set up a Janome sewing machine?” answer-4=”The process of setting up a Janome sewing machine is quite simple. Just place the thread on the spool pin and pass it through the needle. Now, place the bobbin in its container. After that, choose the pattern of your stitch and start sewing it by lowering the presser foot.” image-4=”” count=”5″ html=”true” css_class=””]
Conclusion
Setting up a sewing machine might seem tricky at first. But once you have learned the setup, it will become quite simple and fun like a hobby to do.
However, there are different types of machines all having a specific purpose. And to understand all about this, we have provided the best information for your sewing journey.
Just read the above-mentioned article with proper concentration and you’ll never regret it (guaranteed). If you got any kind of query, in case, let us know in the comment section.
Happy Sewing!