

Are you passionate about sewing? Whether you’re a seasoned seamstress or just starting out on your sewing journey, having a well-functioning sewing machine is crucial to bring your creative visions to life. That’s why, in this article, I will delve into the common issues of Sewing Machine Skipping Stitches And Shredding Thread.
A reliable machine can be your best friend, guiding you through countless projects and ensuring smooth, precise stitches. A malfunctioning or poorly maintained machine can quickly become a frustrating obstacle, hindering your progress and dampening your enthusiasm.
Sewing Machine Skipping Stitches And Shredding Thread:
We will explore the reasons behind these problems and provide practical solutions to overcome them. By addressing these issues head-on, I aim to empower you to maintain your sewing machine’s performance and ensure an uninterrupted, enjoyable sewing experience.
So, whether you’re a beginner seeking guidance or an experienced sewist looking to troubleshoot, join me to unravel the secrets to resolving these common sewing machine issues.
Let’s reclaim the joy of sewing and embrace the wonders of a well-functioning machine!
Stitches Skip Causes And Remedies:
To effectively address these common sewing machine issues, let’s explore the causes behind skipping stitches and thread shredding. Understanding these causes is crucial for diagnosing and resolving these issues, ensuring consistent and flawless stitches.
1. Dull or Bent Needle:
Using a needle that is dull or bent can prevent the proper formation of stitches, resulting in gaps in the fabric.
2. Improper Threading:
Incorrectly threading the machine, and skipping any thread guides or tension discs, can lead to stitch irregularities.
3. Incorrect Needle and Thread Combination:
Using a mismatched combination of needle and thread, such as using a heavy-duty needle with fine thread or vice versa, can cause stitches to skip.
4. Tension Problems:
Incorrect tension settings, either too loose or too tight, can disrupt the smooth formation of stitches.
If your sewing machine isn’t stitching properly, take these steps to troubleshoot and resolve the issue.Read Here: How to fix sewing machine not stitching
Thread Shredding: 3 Possible Causes
1. Incompatible Needle and Thread Combination:
Using a needle and thread that are not compatible in terms of size, type, or weight can cause excessive friction and result in thread shredding.
2. Thread Path Obstructions:
Obstructions along the thread path, such as tangled thread or debris, can create tension issues and lead to thread breakage.
3. Burrs or Snags on Machine Parts:
Rough edges, burrs, or snags on the needle plate, presser foot, or other machine components can damage the thread, causing it to fray or break.
By identifying these causes, you can take appropriate steps to address the issues of skipping stitches and thread shredding, ensuring consistent and high-quality stitches in your sewing projects.
Skipping Stitches-Sewing Machine(Troubleshooting)
To effectively troubleshoot skipping stitches, it’s important to systematically inspect and evaluate various elements of your sewing machine. Let’s explore the key areas to focus on during diagnosis.
Inspecting the Needle:
Start by inspecting the needle for any signs of damage, such as bends, dull points, or burrs. Even a slightly damaged needle can disrupt stitch formation. If you notice any issues, replace the needle with a new one appropriate for your fabric and project.
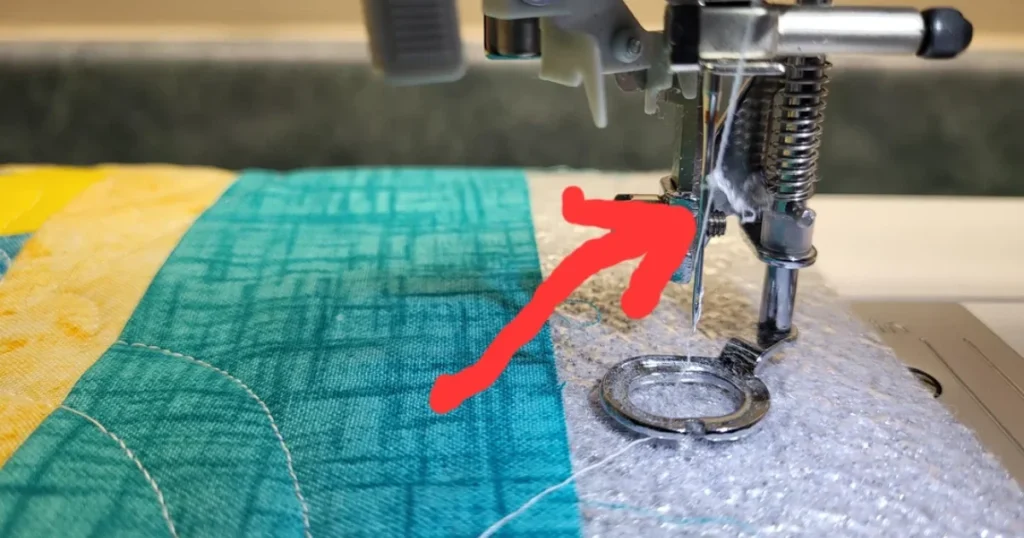
Evaluating the Thread Path:
Thoroughly examine the thread path, from the spool to the needle, for proper threading and potential obstructions. Ensure the thread is correctly seated in all thread guides, tension discs, and the needle eye. Remove any tangled thread or debris that might hinder smooth thread flow.
Identifying Bobbin Issues:
The bobbin plays a crucial role in stitch formation, so it’s essential to inspect it for potential problems. Check that the bobbin is wound correctly and inserted properly into the bobbin case. Ensure the bobbin tension is appropriately adjusted to prevent loose or tight stitches.
Examining the Feed Dogs and Presser Foot:
The feed dogs and presser foot work together to move the fabric smoothly during sewing. Inspect the feed dogs for any obstructions or buildup of lint that may hinder their movement. Similarly, ensure the presser foot is clean and properly aligned to maintain consistent fabric feeding.
Solutions for Skipping Stitches:
Once you’ve diagnosed the cause of skipping stitches, there are several solutions you can implement to rectify the issue and achieve smooth, even stitches.
Replacing the Needle:
If the needle is damaged or dull, replace it with a new one. Remember to choose the correct needle type and size based on your fabric and project.
Correcting Thread Tension:
Experiment with adjusting the upper thread tension, making slight changes at a time, until the stitches form evenly.
Adjusting Feed Dogs and Presser Foot Pressure:
If the fabric isn’t moving smoothly, you may need to adjust the feed dog height or presser foot pressure. Consult your machine’s manual for guidance on making these adjustments.
Addressing Bobbin Problems:
If the bobbin tension is too loose or tight, adjust it accordingly. Refer to your machine’s manual for instructions on adjusting bobbin tension.
Thread Shredding-Sewing Machine (Troubleshooting)
Assessing Needle and Thread Compatibility:
Check that you are using the correct needle and thread combination for your fabric. Some fabrics require specific needle types and thread thicknesses for optimal performance.
Evaluating Thread Path Obstructions:
Inspect the entire thread path for any obstructions that may be causing friction or tension on the thread. Remove any tangled thread, lint, or debris that could interfere with the smooth flow of the thread.
Checking for Burrs or Snags:
Examine the needle plate, presser foot, and other machine parts for burrs or snags that could be catching and damaging the thread. Smooth out any rough spots or consider replacing damaged parts.
Examining the Bobbin and Bobbin Case:
Inspect the bobbin and bobbin case for any signs of damage or irregularities contributing to thread shredding. Ensure the bobbin is correctly wound and securely seated in the bobbin case.
Solutions for Thread Shredding:
Once you have diagnosed the cause of thread shredding, implement the following solutions to overcome the issue and achieve clean, unbroken stitches.
Using the Correct Needle and Thread Combination:
Ensure that you are using a compatible needle and thread combination based on your fabric type and project requirements. Consult your machine manual or a knowledgeable source for needle and thread recommendations.
Clearing Thread Path Obstructions:
Thoroughly clean the thread path, removing any obstructions or tangled thread that could cause friction or tension issues. This will help ensure smooth thread flow during sewing.
Resolving Burrs and Snags:
Smooth out any burrs or snags on the needle plate, presser foot, or other machine parts that could catch and damage the thread. This can be done by carefully filing or replacing damaged parts.
Adjusting Bobbin Tension:
Check the bobbin tension and make necessary adjustments to ensure balanced tension between the top and bobbin threads. Consult your machine manual for specific instructions on adjusting bobbin tension.
Sewing Machine Skipping Stitches and Shredding Thread: Guide To Follow
While addressing and resolving skipping stitches and thread shredding issues is important, it’s equally crucial to adopt best practices to prevent these problems from occurring in the first place. Here are some key tips to keep in mind:
Choosing the Right Needle and Thread:
Always select the appropriate needle and thread combination for your fabric type and project requirements. This ensures smooth stitching and minimizes the risk of skipped stitches or thread shredding.
Proper Threading Techniques:
Follow proper threading techniques as recommended by your sewing machine manual. Pay close attention to threading the machine correctly, ensuring that the thread is securely seated in all necessary guides and tension discs.
Consistent Machine Maintenance:
Regularly clean and maintain your sewing machine to prevent the accumulation of dust, lint, and debris that can interfere with its performance. Follow the manufacturer’s guidelines for cleaning and oiling to ensure optimal operation.
Careful Fabric Handling:
Handle your fabric with care, avoiding excessive pulling or pushing that could strain the machine and lead to skipped stitches or thread shredding. Use appropriate sewing techniques and adjust the machine settings as needed for different fabric thicknesses and textures.
FAQs:
Why is my sewing machine threaded but not stitching?
If your sewing machine is threaded but not stitching, it could be due to a damaged or incorrectly installed needle, using the wrong needle type for your project, or issues with thread tension or threading.
How to fix an industrial sewing machine that is skipping stitches?
To fix an industrial sewing machine that is skipping stitches, check and adjust the tension on both the top and bottom thread. Ensure the correct needle type is used, and make sure the thread path and tension are properly set for smooth stitch formation.
How do you fix jump stitches?
To fix jump stitches in machine embroidery, use small nippers or scissors to trim them closely without cutting the fabric itself. This will result in cleaner embroidery.
What is the best solution if stitches loop?
If stitches are looping, adjusting the tension can help. Loosen the top tension or tighten the bottom tension to address loops on the upper side. Adjusting the upper tension can resolve loops on the underside.
What are the remedies if the machine does not stitch?
If the machine does not stitch, check the needle plate for scratches or damage around the needle hole. Replace if necessary. Ensure correct threading, proper tension settings, and use the appropriate needle and thread for stitching.
Conclusion:
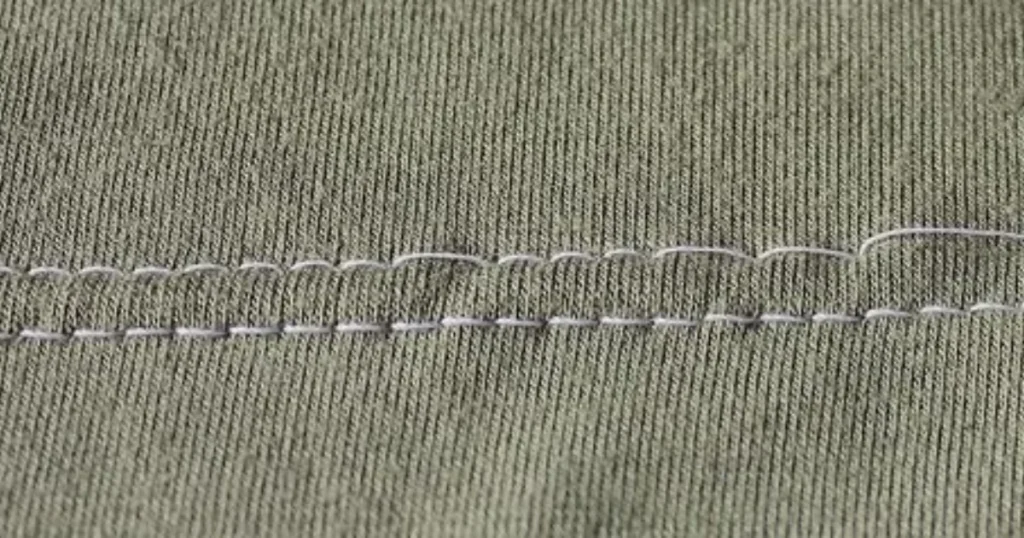
Sewing machine Skipping stitches and thread shredding can have a significant impact on the quality and outcome of your sewing projects. They can result in uneven seams, compromised structural integrity, and a less professional appearance.
However, by understanding the causes and implementing the solutions provided in this article, you can overcome these issues and achieve flawless stitches.
Remember to check and prepare your sewing machine diligently, diagnose the specific causes of skipping stitches and thread shredding, and apply the appropriate solutions.
By adopting best practices such as choosing the right needle and thread, threading correctly, maintaining your machine, and handling fabric with care, you can prevent these issues from occurring in the first place.
I value your feedback! Have you found this article helpful in addressing skipping stitches and thread shredding? Share your thoughts, experiences, and any additional tips in the comments below.
With each stitch, you have the power to turn fabric into art and bring your creative vision to life. So, keep sewing, keep exploring, and let your imagination soar!
